You've got a sketch, a CAD file, or a rough idea that keeps nagging at you. You can see the product in your head. You can almost feel it in your hand. But you still don't know if the grip is awkward, if the lid seals, or if the thing will feel cheap when a customer opens the box.
That gap is where founders burn time and money.
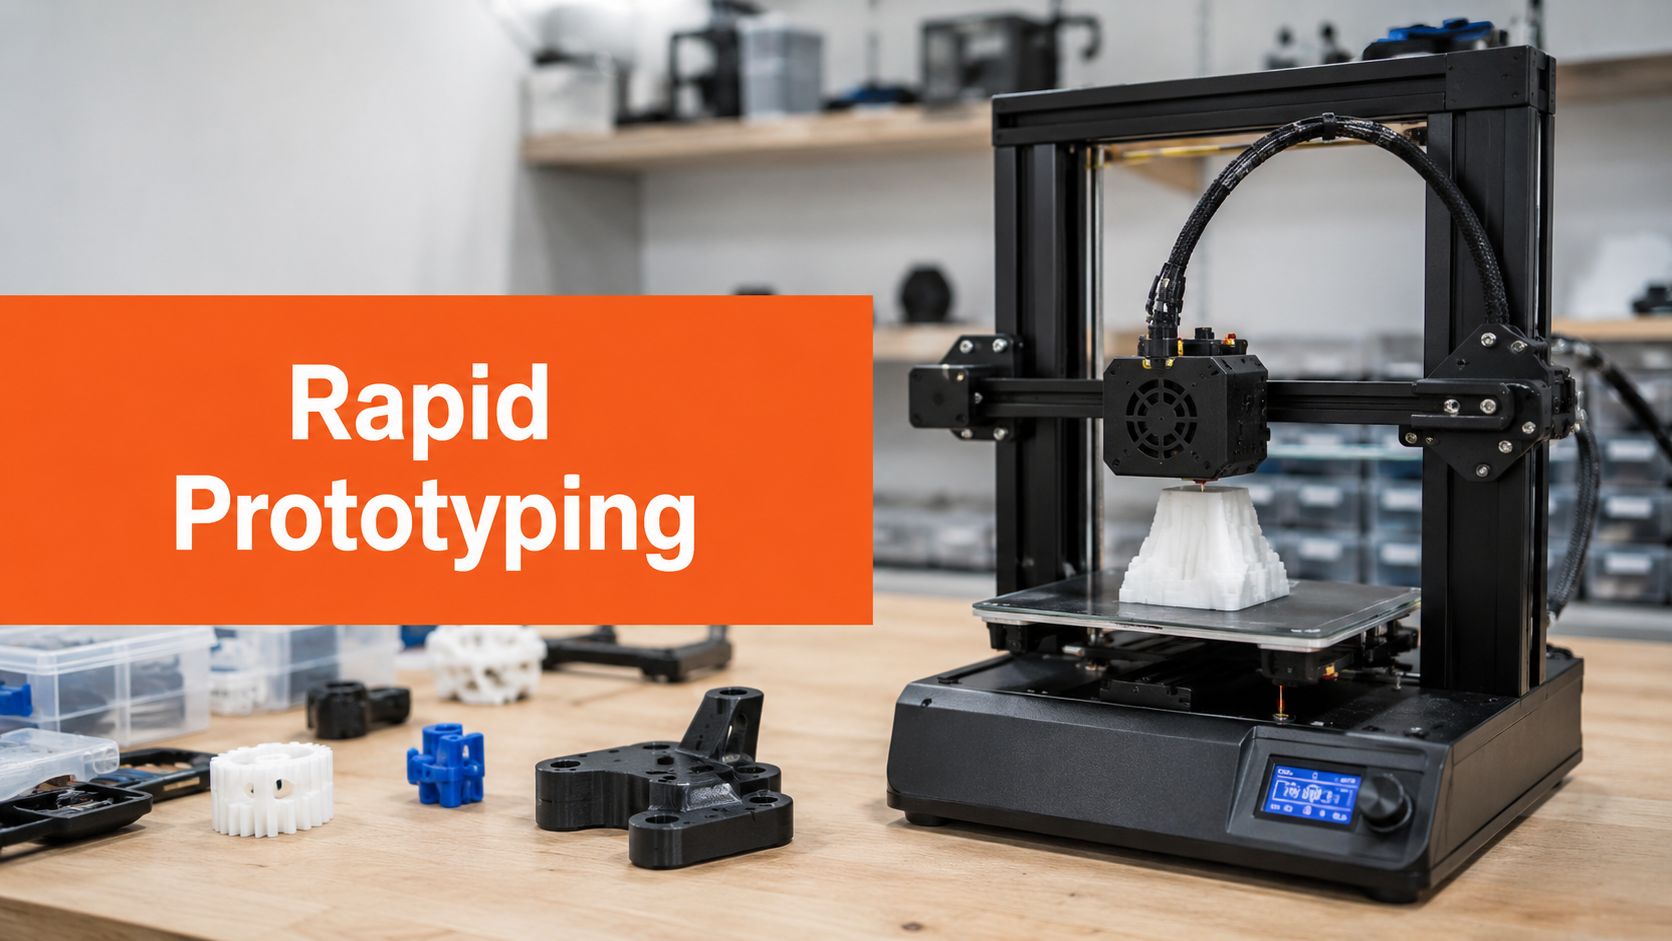
I've watched people go straight from renderings to tooling because they were in a hurry or because a factory told them it was “good enough.” Then reality shows up. The hinge binds. The cable exit is in the wrong spot. The button feels mushy. The part looks great on a screen and wrong in your hand. Rapid prototyping in manufacturing is how you avoid that mess. You make the product real early, beat it up, learn fast, and change it before the expensive decisions lock in.
Your Great Idea Needs a Physical Form
You're in Chicago, you've got a CAD file open, and a factory rep is asking for final dimensions. It feels like progress. It isn't. Until you can put a rough version in your hand, you are still arguing with your own assumptions.
A physical product idea starts getting real when you can touch it, test it, and hand it to someone else without explaining what they're supposed to feel. I don't care if that first version is ugly. Foam core, resin, FDM print, taped parts from the shop down the street. Fine. What matters is that you stop relying on the clean fiction of a screen.
Rapid prototyping turns guesswork into evidence. You make a rough object, learn what fails, and revise before the expensive decisions pile up. If you're building in the Midwest, that speed matters even more because you can often get parts faster by working with a local machine shop, university lab, or service bureau instead of emailing files back and forth across time zones.
What first-time founders usually get wrong
A common mistake for first-time founders is treating prototyping like a mini production run.
Use a prototype to answer one question at a time. That is the rule.
Maybe you need to know:
- Does it fit the hand
- Does the latch close
- Does the PCB fit the enclosure
- Does a new user understand it without instructions
That's enough. If one prototype gives you a clear yes or no on one of those questions, it worked.
Practical rule: Build one prototype for grip, another for fit, another for function. Don't force one model to prove everything.
I've done this with handheld devices, packaging, fixtures, and consumer products. The same pattern shows up every time. A part that looked slim in CAD feels bulky in the hand. An opening direction that seemed obvious confuses the first person who tries it. A seam line lands exactly where the customer's thumb rests.
Those are good failures. They are cheap failures.
Why this step happens before manufacturing
Prototype before you commit real money to tooling, materials, and factory setup. Once those choices harden, small fixes stop being small. A minor geometry change turns into a new tool insert, another supplier call, another delayed build.
Because of that, fast local iteration gives you an edge. If you're in Chicago or anywhere in the Midwest, don't default to distant vendors for early learning. Start with nearby resources you can visit. Ask local 3D print shops about same-week turnaround. Check university maker spaces and engineering labs. Look for small CNC shops that are willing to quote one-off parts without pushing you toward volume. The founder who can drive across town, inspect a part, and revise the file that afternoon learns faster than the founder waiting three days for an email update.
That's the standard you want. Short loops. Real parts. Clear answers.
Your first win is not production. Your first win is getting to the truth before you spend like you already found it.
Why Rapid Prototyping Is Your Startup's Secret Weapon
A prototype saves more than money. It saves you from false confidence.
Founders love certainty, so they cling to slide decks, renderings, and supplier promises. None of that tells you what happens when a user presses the button with wet hands, drops the device into a backpack, or tries to assemble the refill without instructions. A prototype turns vague opinions into specific feedback.
It speeds up every hard conversation
When you put a prototype on the table, people stop talking in abstractions.
Your engineer stops saying “we may need more clearance” and points to the exact interference. Your investor stops asking broad questions and starts asking the right ones. Your first customer doesn't say “cool idea.” They say “this edge digs into my palm” or “I'd want the opening on the other side.”
That's useful. Useful beats flattering every time.
A render gets compliments. A prototype gets objections. You want objections while the fixes are still cheap.
It lowers risk where startups usually get hurt
Most startup product mistakes come from one of three places:
Bad assumptions about use
You guessed how people would hold, store, wear, or refill the product.Bad assumptions about assembly
You didn't test tolerances, fasteners, snap fits, cable routing, or mating parts.Bad assumptions about production
You built something that can't scale cleanly into repeatable manufacturing.
Rapid prototyping in manufacturing helps with all three because it forces contact with reality early. You stop debating. You start testing.
There's also a bigger signal here. BigRep cites a projection that the global rapid prototyping market will grow from $3.33 billion in 2024 to $21.47 billion by 2034 in its overview of rapid prototyping and 3D printing. I don't bring that up to sound impressive. I bring it up because it tells you this isn't a hobby tool anymore. Serious manufacturers use it as part of the normal build process.
What I tell new founders
Treat prototypes like decision tools, not presentation pieces.
Use them to kill weak ideas fast. Use them to pressure-test design choices before your supplier starts cutting tools. Use them to tighten your product story too. It's easier to sell, fund, and refine a product when people can touch it.
Here's my blunt advice:
Prototype before branding polish
Your logo can wait. Your geometry can't.Prototype before factory commitment
Don't let a supplier push you into tooling because you're excited.Prototype before big inventory bets
If you haven't tested the thing physically, you're still guessing.
A startup doesn't need fewer surprises. That's impossible. It needs cheaper surprises. Prototyping gives you those.
The Main Prototyping Technologies Explained
You don't need to memorize every machine on earth. You just need a clean mental model.
I sort most prototype methods into three buckets: additive, subtractive, and molding. If you understand those, you can talk to shops without sounding lost and you can make smarter calls on speed, cost, and realism.
Here's the visual version first.
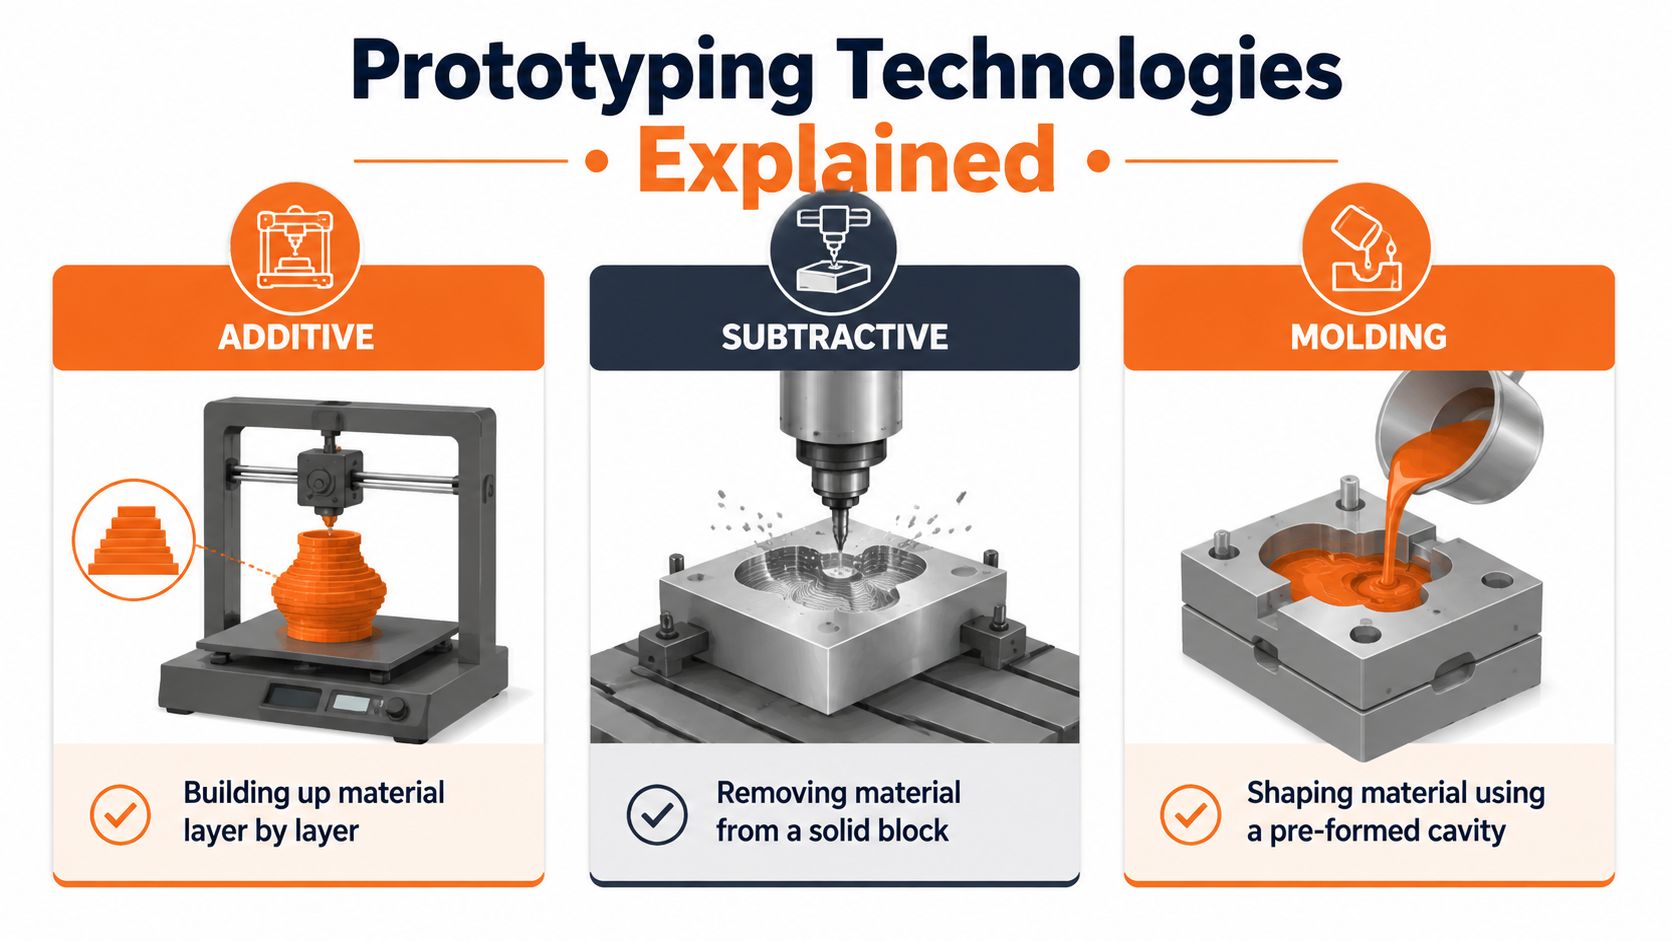
Additive means building it up
This is the bucket most founders mean when they say “3D printing.” The machine creates the part layer by layer, like a very precise hot glue gun following a digital path.
The common names you'll hear are FDM, SLA, and SLS.
- FDM is the rough-and-ready option. Good for basic shape checks, brackets, mockups, and quick housings.
- SLA is cleaner and more detailed. Fresh Consulting notes that SLA can be up to 10× faster than FDM in some prototyping workflows in its article on rapid prototyping methods and strategy. I like it for appearance parts, small enclosures, and fit checks where surface quality matters.
- SLS is a workhorse for tougher functional parts. It's a common choice for engineering prototypes like brackets and ductwork when you need stronger testing.
If you want a broader frame for how digital tools fit into factory work, this piece on optimizing manufacturing with technology is worth a read.
Subtractive means carving it down
Subtractive methods start with a block of material and cut away what you don't need. Think of a sculptor carving stone, except the sculptor is a CNC machine.
This matters when you need:
- Real production materials
- Tight tolerances
- A cleaner signal on machinability
- Metal parts or rigid plastic parts that need accuracy
If you're fuzzy on what a shop does here, this plain-English explainer on what a machine shop is will save you some confusion before your first supplier call.
A CNC-machined prototype usually tells you more about final-part behavior than a basic print does. The tradeoff is speed and cost. You don't reach for machining when you're still changing the design every few hours.
Here's a quick comparison:
| Technology | Best For | Typical Speed | Relative Cost |
|---|---|---|---|
| Additive | Early concepts, fast iteration, fit checks | Fast | Low to medium |
| Subtractive | Tight-tolerance parts, metal parts, realistic functional tests | Medium | Medium to high |
| Molding | Small batches, pilot runs, material realism | Medium | Medium to high upfront |
To see these methods in motion, this walkthrough is useful.
Molding means making copies from a form
Molding is what you use when you want several parts that behave more like final production parts. Think silicone molds, urethane casting, or aluminum rapid tooling.
Process choice gets practical. Fresh Consulting points out that 3D printing is often fastest for quick iterations, while aluminum-mold rapid tooling can make parts with production-grade plastics for pilot runs in that same article. That's exactly how I think about it. Print for speed. Tool for realism when the test demands it.
Molding is useful when you need to check:
- Small-batch manufacturability
- Material feel
- Pilot sales samples
- Assembly process before hardened tooling
If your goal is ten fast shape checks, don't start with molds. If your goal is a small pilot batch in a production-like plastic, molding starts to make sense.
Choosing the Right Prototyping Method for Your Goal
Most founders ask the wrong first question.
They ask, “What's cheapest?” or “What's fastest?” The key question is, what are you trying to learn? If you don't answer that first, you'll pay for the wrong prototype and get muddy feedback.
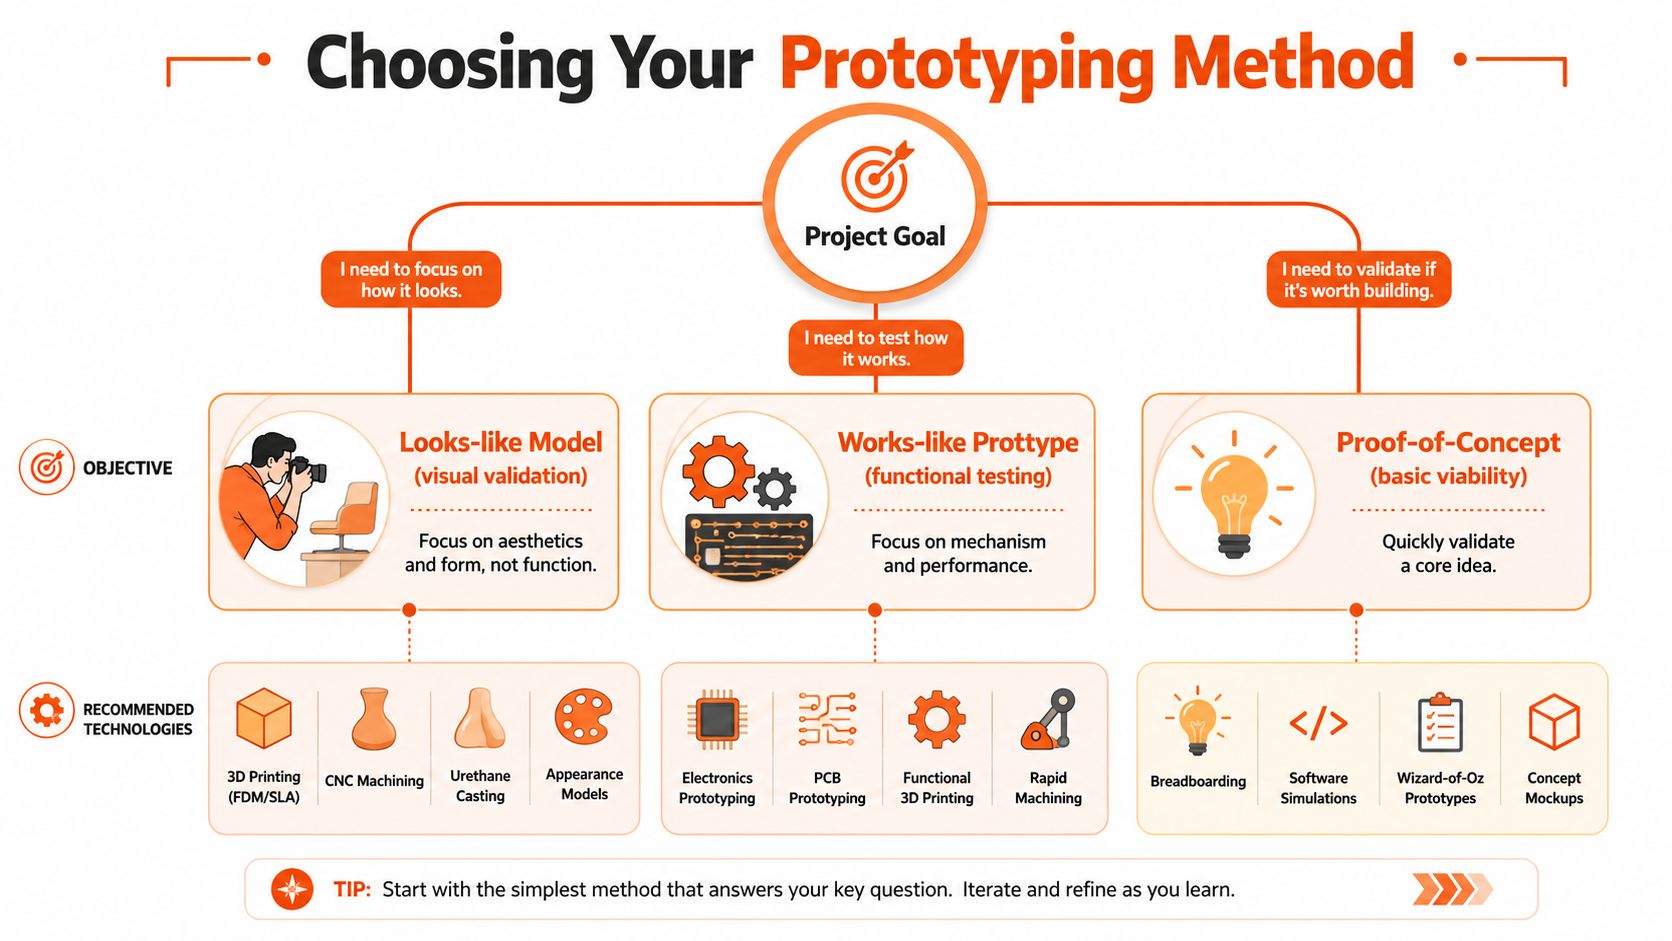
Start with the test, not the machine
I use three simple categories.
Looks-like model
Use this when you care about shape, proportions, appearance, and shelf presence. You're checking whether the product looks right in a hand, on a counter, or in a photo.
Cleaner 3D prints and basic appearance models do the job. Don't overpay for performance you don't need.
Works-like prototype
Use this when the product has to move, snap, seal, hold weight, survive handling, or fit with other parts. Here you care about mechanism and behavior, not just appearance.
In this context, stronger printed parts, machined parts, or more realistic molded samples earn their keep.
Proof-of-concept build
Use this when you're testing one core idea. Maybe the suction works. Maybe the hinge geometry solves the problem. Maybe the refill path is easy enough for a customer.
This stage can be ugly. It often should be.
Founder filter: If a prototype doesn't answer a clear question, don't build it yet.
A simple decision framework
Ask yourself these questions in order:
What single question am I trying to answer?
One question is better than five fuzzy ones.Does appearance matter more than performance right now?
If yes, stay light and fast.Do I need the final material or something close to it?
If yes, move toward machining or molding.Will I test this with users, engineers, or factories?
The audience changes the right prototype.Am I iterating daily or validating a near-final design?
Daily changes favor printing. Near-final checks can justify slower methods.
My recommendation by startup stage
Idea stage
Use the fastest rough method possible. You're still learning basic truths.Pre-launch development
Mix methods. One prototype for user feel, another for engineering fit, another for pilot packaging.Before production commitment
Build a prototype that acts closer to the finished part and exposes assembly issues.
Don't marry one method. Use the right one for the question in front of you. That's how rapid prototyping in manufacturing saves time.
Your Startup's Prototyping Playbook
You're six weeks into CAD revisions, your contractor wants direction, and you're staring at a cart with a desktop printer on one tab and three shop quotes on another. I've been there. Treat this as an operating decision, not a philosophy debate.
Should you buy a machine or hire a shop?
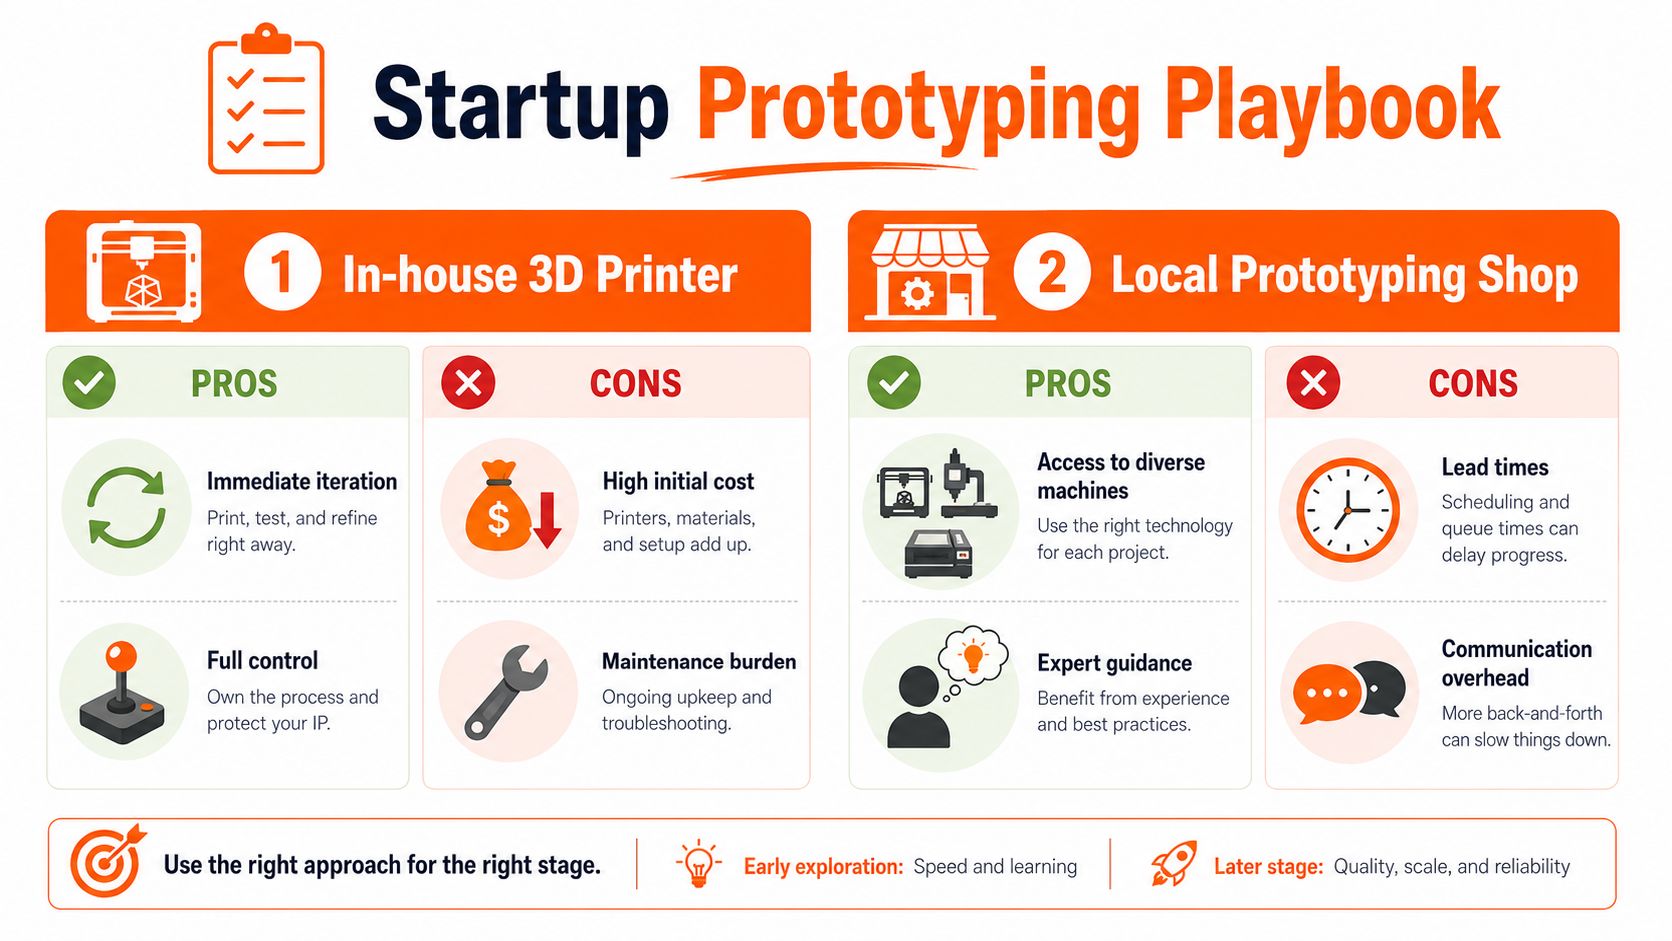
My rule is simple. Buy speed. Rent specialization. If your product changes every day, get a printer close to your team. If you need a wider range of processes, better materials, cleaner finishes, or manufacturing feedback, use outside partners.
When I'd buy an in-house printer
I'd buy one when the team is changing geometry constantly and needs physical feedback fast. The primary benefit is cycle time. You tweak a file in the morning and hold the part by the afternoon or next day. That pace changes how you design.
Go in-house if you need:
- Daily iteration on enclosures, clips, mounts, handles, or packaging inserts
- Fast fit checks before paying for higher-accuracy parts
- Private development when you don't want every revision sent outside your office
Do not buy a printer because it feels like “real engineering.” Buy it because repeated small decisions are blocking progress.
When I'd use a local shop
Use a shop when the prototype needs to teach you something a rough office print cannot. That usually means better material behavior, tighter tolerances, machining, urethane casting, sheet metal, or help spotting bad assumptions before they get expensive.
A good vendor also protects first-time founders from predictable mistakes. If you're comparing outside options, this overview of rapid prototyping services is a useful starting point for understanding what specialized vendors can handle.
If you're in Chicago or the Midwest, stay local earlier than you think. You will learn faster if you can drive over, hold samples, argue about tolerances in person, and build relationships before you ask for production help. I'd also review this practical guide to product design and prototyping for Chicago founders because it connects early concept work to the manufacturing path that follows.
Budget in rounds, not one lump sum
I see early-stage founders get stuck because they treat prototyping like one line item. That's a mistake. Break the budget into rounds tied to decisions.
I use three buckets:
Round one is for ugly learning
Cheap and fast. You're testing assumptions, not chasing polish.Round two is for function
Better accuracy, stronger materials, and more honest mechanical feedback.Round three is for pre-production confidence
Assembly checks, finish checks, pilot units, and packaging fit.
This keeps you from burning money on a beautiful prototype that answers the wrong question.
If the geometry is still changing, keep the finish rough and the spend low.
Build with manufacturing in mind
I often see founders create a prototype that proves the concept and ultimately kills the business case. The part works once. It just cannot be made cleanly, repeatedly, and profitably.
That's the primary job of DFM. Ask whether a factory can make the part without constant fixes, slow assembly, or ugly compromises.
Watch for:
- Wall thickness that changes for no good reason
- Features that are hard to mold, machine, or assemble
- Fasteners and snaps that frustrate line workers
- Part splits and seams placed in weak or visible areas
You do not need to become a manufacturing engineer. You do need to stop approving fantasy parts.
If you're building in Chicago or anywhere in the Midwest, use the region to your advantage. Call local job shops. Visit molder reps. Ask who they trust for soft tooling, CNC, and small pilot runs. The founders who move fastest are usually the ones who build a short bench of nearby partners before they need them.
Real-World Examples from the Trenches
I've seen founders learn more from one rough prototype than from weeks of meetings.
One founder was building an ergonomic kitchen tool. The first CAD looked clean. The renderings looked expensive. Then we printed a rough series of handle variations and handed them to actual people. Within minutes, the problems were obvious. One thumb rest pushed the grip too high. One button location worked for large hands and annoyed everyone else. One edge felt sharp when users twisted the tool under load.
The point wasn't that the first design was “bad.” The point was that ergonomics is a liar on a screen. Once people held the object, the team knew what to change and what to keep. A mold change later would've been painful. A file change at prototype stage was easy.
A small batch can answer a big question
Another founder had a home goods product and felt pressure to place a large tooling order before testing demand. That would've been reckless.
Instead, they built a small batch of near-final samples in a more realistic form than a rough print. That let them test packaging fit, shoot product photos, hand units to early buyers, and watch how people used the product after delivery. The most useful feedback had nothing to do with the hero feature. Customers cared about opening, storage, and whether the product looked giftable out of the box.
What these stories have in common
Both founders won because they used prototypes to answer specific questions.
- The kitchen tool founder tested hand feel and control.
- The home goods founder tested real-world buyer reaction and product presentation.
Neither one treated prototyping like theater. They treated it like evidence gathering.
That's the mindset I want you to steal. If you're building a physical product, don't ask whether you should prototype. Ask what question your next prototype needs to answer.
Your Chicago Prototyping Action Plan
If you're in Chicago or the Midwest, you don't need to solve this alone from your laptop. You need a short list, a few visits, and better conversations.
Start local. You'll move faster when you can drive to a shop, hold samples, and ask blunt questions in person.
The shortlist I'd use this week
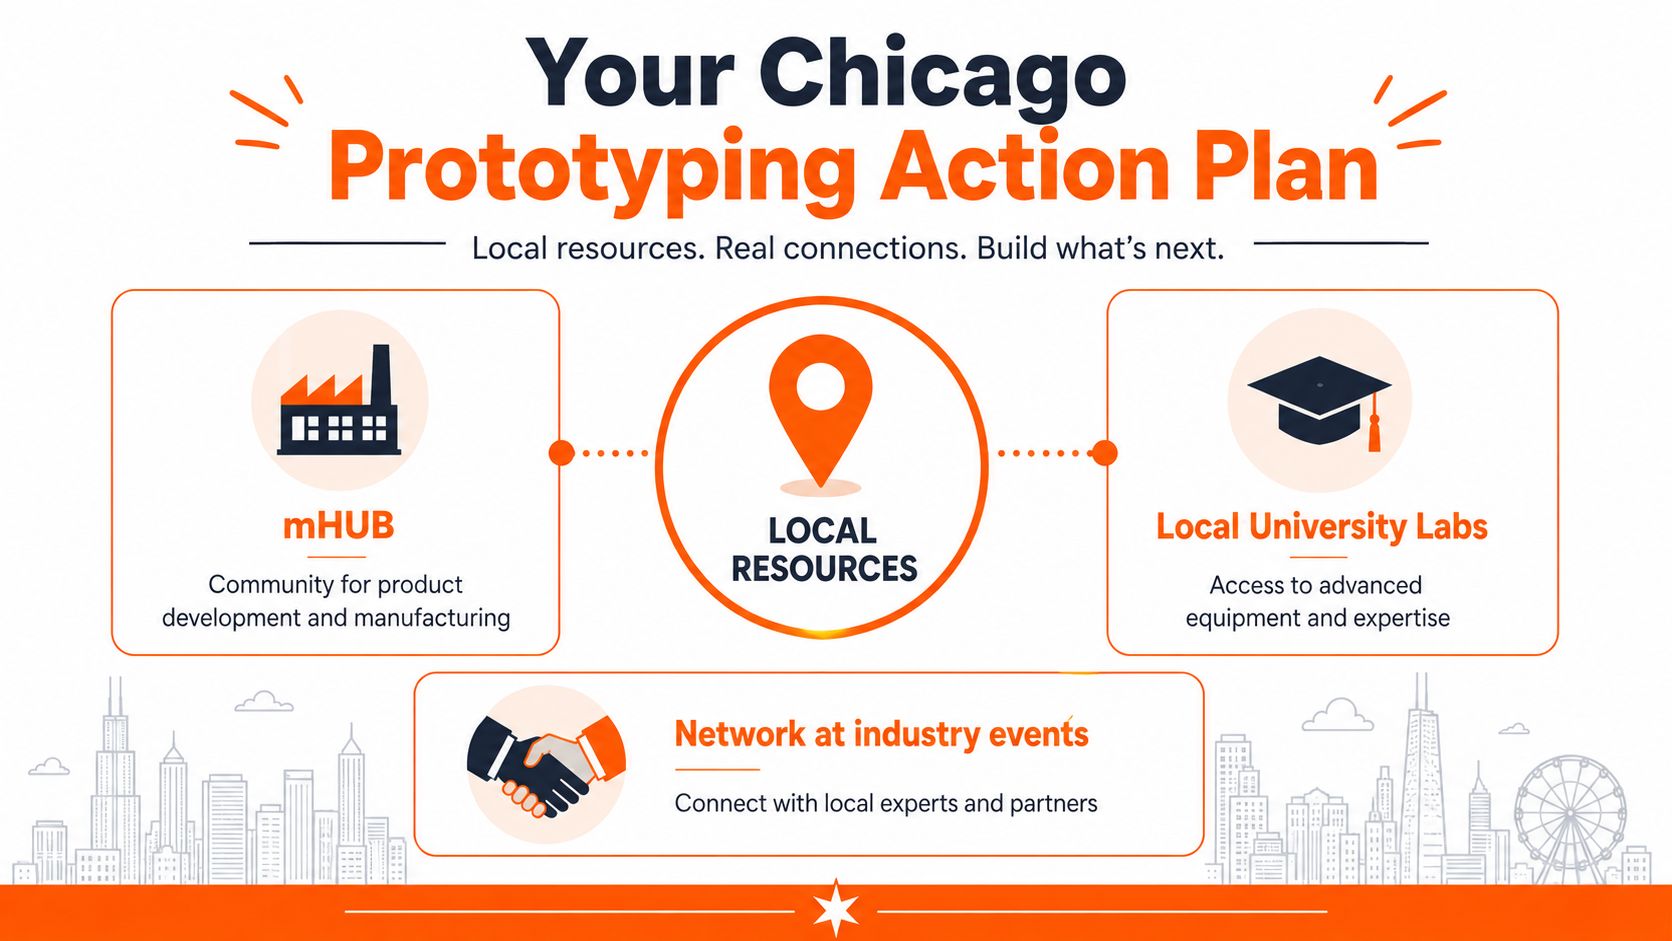
Start with mHUB if you need a Chicago manufacturing community and exposure to product development resources. Then look at local university labs and maker spaces if you need access, introductions, or early technical feedback. For quick local context on what shops and founders are doing, this guide to 3D printing in Chicago is useful.
Then build your own operator list.
- Machine shops for machined parts and tolerance-heavy work
- 3D printing shops for fast iteration and appearance models
- Packaging vendors if your product depends on insert fit or retail presentation
- Small assembly partners if your product has multiple parts and handling steps
How to vet a local partner fast
Don't ask, “Can you make this?” Every shop says yes. Ask better questions.
What process would you use first, and why?
You want a real opinion, not blind order-taking.What part of this design worries you?
Good partners spot risk quickly.What files do you need from me to quote and advise properly?
Their answer tells you how organized they are.What would you change if this had to scale later?
This exposes whether they understand manufacturing, not just prototyping.
On a factory tour, look at the floor. Look at the labeled parts. Look at whether samples are organized. Sloppy process usually leaks into part quality and communication.
What to bring to your first visit
Bring these five things:
- A printed one-page brief with product purpose, target user, and what you need to learn
- A simple CAD export or drawings
- An old prototype or mockup, even if it's ugly
- A competitor sample if one exists
- A clear deadline for your next decision
Don't try to sound complex. Try to sound clear.
If you want private feedback from other operators before you spend more money, Chicago Brandstarters has small founder dinners and a vetted group chat where people share product, sourcing, and manufacturing war stories in a confidential setting. For an early-stage founder, that kind of candid feedback can help you pressure-test your next move before you commit to a shop or a tooling path.
If you're building a physical product in Chicago or the Midwest and want honest feedback from founders who've dealt with prototypes, factories, and all the dumb mistakes in between, apply to Chicago Brandstarters. It's a free, vetted community built for kind, hard-working founders who want real conversations, not networking theater.
Leave a Reply